A-Arm Installation
A-Arm Installation
Learn how to install those puppies!
We all know following instructions stinks, but we hope we did a fine job explaining the process below. If you have any issues or questions please contact us
With the bike raised and, on a jack, or stands and the front tires off. Remove the tierod from the one side your working from and remove your stock tierod ends and reassemble them to the new tierod that came with your kit and set aside.
Start with removing arms on one side only. You will want to leave the other side assembled with your stock arms on for reference for later measuring. You can take measurements from the stock side to help set up your new arms.
Put your new arms on right out of the box. We try to get them closely set up for you to start. (DO NOT USE THREAD LOCKER YET)
Install one side completely only hand tight using all of your stock bolts
If you feel you have problems with the tierods and they seem to long adjust the small heims out equal amounts starting with half to one turn at a time. You can also turn out the balljoint if needed.
Be sure to count the turns either by half or full turns and write down for reference to match the other side. This way you will have less measuring to do on the other side. All threaded joints should not be turned any farther than 6 turns out.
Once both sides are installed (only hand tight) put the wheels back on and remove the bike from the jack or stand. No frame geometry is going to be exactly to same from one frame to the next. Sometimes the arm mounting tabs are a bit off, so we recommend the “fine tuning” to line everything up.
While the bike is on the ground straighten the handlebars and adjust the tierods till the wheels are in the straight position.
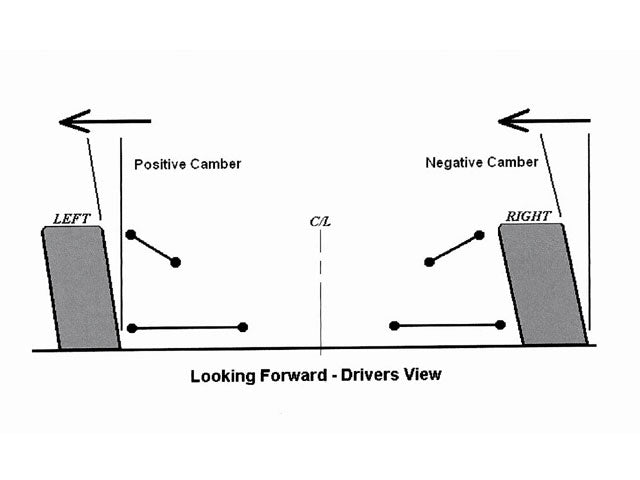
Once you have a visual of what needs to be adjusted you can make minor adjustments to the heims or balljoints in half turn increments. Be sure to write down the adjustments made and replicate them on the other side. A large framers square can be used to set the camber.
Once you have adjusted both arms on both sides where you want them to be then adjust your tierods. A tape measure can be used to measure the “toe” front the center of the tire in front and in the measurement should be the same for the front and rear measurement.
Now you can use Red Permatex high strength thread locker on all threads and tighten the jamb nuts. Tip: unscrew one joint at a time and count the number of turns to remove it and add the thread locker and screw it back in the same amount of turns. Do not exceed 6 turns out for any joints.
Wait 24 hours for thread locker to cure before riding.
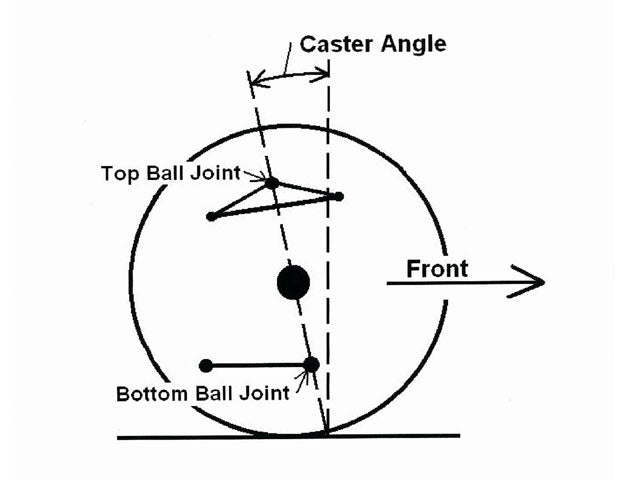
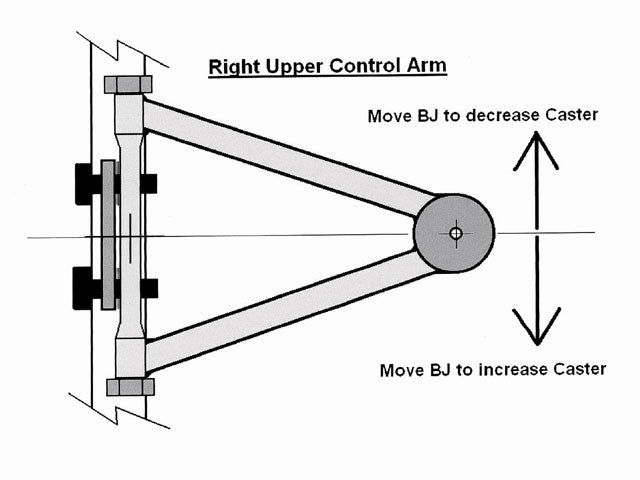
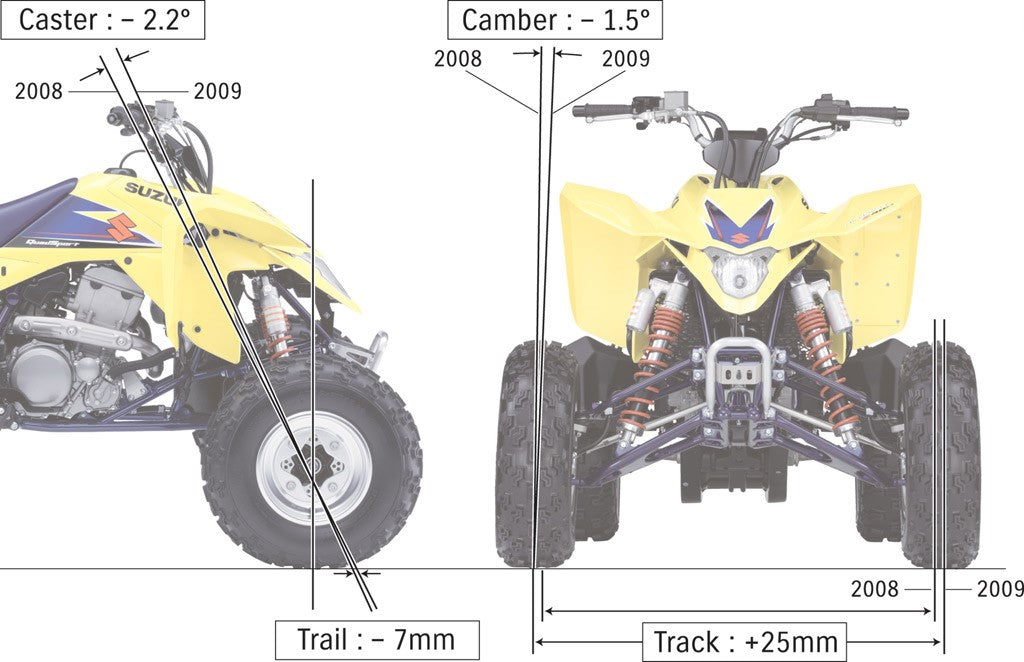
Below are some examples of Caster, Camber and Toe. Search these phases on Google for more. We will be doing an installation and set up video soon.
We know this is really what you want to see! Be sure to still review the steps above too.

